A well-placed accent tile can turn an ordinary shower into a focal point. Homeowners tackling bathroom renovations often underestimate how much visual impact a single wall or niche of contrasting tile can deliver, without blowing the budget or extending the timeline. Whether working with a professional installer or handling the job solo, accent tiles offer a way to add personality and depth to what’s often the most utilitarian space in the home. The key is choosing a design that complements the field tile, suits the room’s scale, and holds up to constant moisture exposure.
Table of Contents
ToggleKey Takeaways
- Shower wall accent tiles create visual focal points and design hierarchy without major structural changes or budget overruns, making them one of the highest-impact bathroom upgrades available.
- Vertical stripe accents elongate the shower space and align with showerhead placement, while width choice (12 inches for subtle, 24+ inches for bold) and material contrast determine the visual impact.
- Recessed niches lined with mosaic or glass tiles offer an affordable, functional canvas for accent designs that repeat horizontally for cohesion and maintain proper waterproofing with sloped shelves.
- Hexagon and geometric tiles introduce dynamic visual interest with flexible layout options, though wet-saw cuts and careful planning prevent slivers and ensure patterns don’t overwhelm the space.
- Natural stone accent walls deliver spa-like elegance but require mandatory sealing, pH-neutral cleaners, and a mid-range budget ($8–$25 per square foot), making single-wall applications most practical.
- Color blocking and contrasting grout techniques provide dramatic effects through metal trim transitions and epoxy grout options, though dark grout demands regular cleaning to prevent visible soap scum buildup.
Why Accent Tiles Make a Dramatic Difference in Shower Design
Accent tiles break up monotony. A single field tile across every surface can feel flat, even with quality materials. Adding a band of contrasting tile, a textured feature wall, or a decorative inset creates visual hierarchy and draws the eye to intentional design choices rather than awkward plumbing placement.
From a practical standpoint, accent tiles help define zones. A vertical stripe behind the showerhead, for example, anchors the fixtures and makes the layout feel deliberate. Mosaic accents in niches or around controls add detail where it’s most visible during use. These touches don’t require additional square footage or major structural changes, they’re surface-level decisions with outsized results.
One often-overlooked benefit: accent tiles can mask imperfections or disguise necessary cuts. If a wall terminates at an odd dimension, a well-placed accent strip can camouflage where field tiles would otherwise need awkward slivers. This is especially useful in retrofits where walls aren’t perfectly plumb or where existing plumbing dictates tile layout.
Vertical Stripe Accent Walls for Modern Elegance
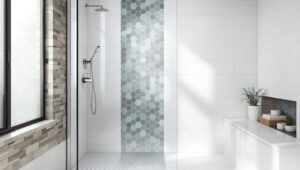
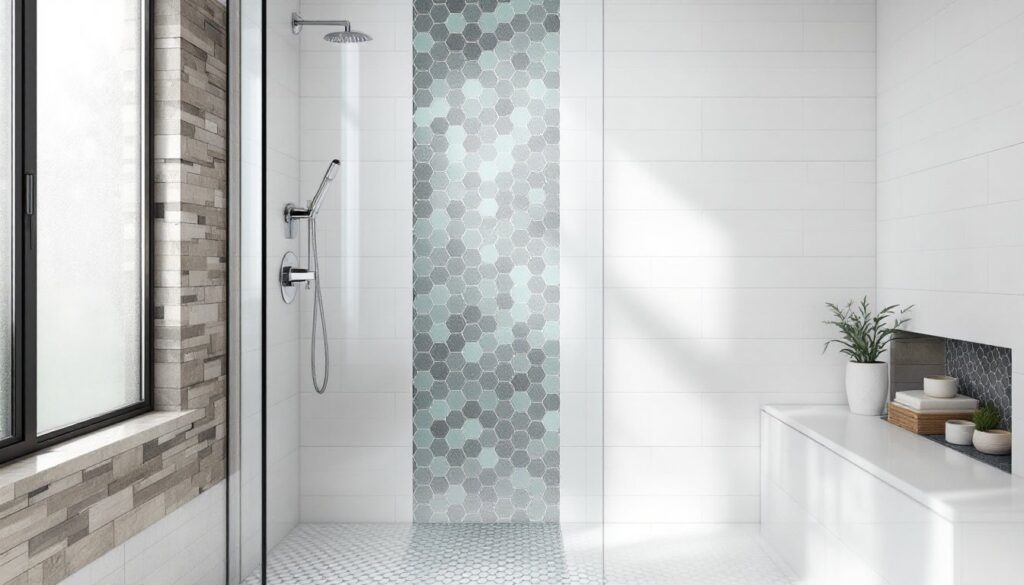
Vertical stripes elongate the shower space and create a clean, architectural look. A single stripe running floor-to-ceiling behind the valve and showerhead is a straightforward execution that doesn’t demand complex cuts or additional waterproofing transitions. Width matters: a 12-inch stripe reads subtle: 24 inches or wider makes a bolder statement.
Material choice drives the effect. Pairing matte field tile with a glossy accent stripe adds contrast without competing colors. Large-format porcelain slabs (such as 12×24-inch or larger) in the accent zone minimize grout lines and emphasize the vertical line. For a more textured approach, stacked stone or 3D ceramic tiles in the stripe add dimension that catches light differently throughout the day.
Layout is critical. The stripe should align with the showerhead and controls, not awkwardly offset to one side unless that asymmetry is intentional. Mark the centerline of the plumbing rough-in before setting any tile. If the shower has a curb or threshold, continuing the stripe all the way to the floor creates a stronger visual anchor than stopping it mid-wall. Homeowners inspired by contemporary bathroom design trends often choose monochrome palettes with high-gloss accents for maximum drama.
Grout color amplifies or softens the stripe. Contrasting grout in the accent area and matching grout in the field tile makes the stripe pop. If the goal is subtlety, use the same grout throughout but rely on tile finish or texture to differentiate the zones.
Mosaic Tile Niches and Recessed Shelving Accents
Recessed niches are functional necessities in most showers, and they’re the ideal canvas for accent tile. A 12×24-inch niche lined with glass mosaic, penny rounds, or small-format porcelain stands out against larger field tiles without overwhelming the space. The back wall of the niche gets the accent treatment: sides and the shelf can match the field tile for a framed effect.
Waterproofing is non-negotiable here. The niche must be built into the wall framing during construction, with a properly sloped shelf (minimum 2-degree pitch toward the shower floor) and a continuous waterproof membrane that ties into the surrounding wall membrane. Many prefabricated niche inserts simplify this step, but they still require membrane integration and careful sealing at all seams.
Mosaic sheets (typically 12×12-inch mesh-mounted) make installation manageable. Cut them with a wet saw or tile nippers to fit the niche dimensions. Use unsanded grout for joints narrower than ⅛ inch, which is common with small mosaics. Sanded grout can scratch glass or polished stone faces during installation.
For a cohesive look, repeat the niche accent elsewhere, perhaps as a band at the shampoo shelf height or as a border along the ceiling line. This repetition ties the design together without adding much labor or material cost. A single 12×12-inch mosaic sheet covers one square foot and typically costs between $8 and $40 depending on material and finish, so even a small niche can be elevated affordably.
Geometric Patterns and Hexagon Tile Features
Hexagon tiles have become a staple in shower accents, available in sizes from 2-inch mosaics to 8-inch or larger individual tiles. They work well as a feature wall, a floor-to-waist wainscot, or a horizontal band at eye level. The six-sided shape introduces geometry without the rigidity of squares or subway tiles.
Layout options multiply with hexagons. A classic honeycomb pattern keeps all tiles oriented the same direction. Rotating every other tile 90 degrees creates a more dynamic, interlocking look. Mixing hexagons in two or three colorways, such as white, gray, and charcoal, adds depth while maintaining a cohesive palette.
Cutting hexagons requires patience. A wet saw with a fresh diamond blade is essential, and cuts should be planned to fall along grout lines wherever possible. If the shower has inside corners, dry-fit the layout first to avoid ending up with tiny slivers that are difficult to set and prone to popping loose. Many renovation guides recommend starting the pattern at the most visible wall and working outward, saving edge cuts for less prominent areas.
Grout width affects the final look significantly. Hexagon mosaics on mesh sheets typically have ⅛-inch joints, which is tight enough to keep the pattern crisp. Larger individual hexagons often use ³⁄₁₆-inch joints, which provide more wiggle room during installation but also introduce more grout lines, so color choice becomes even more important.
For a subtler geometric approach, consider elongated hexagons (pickets) or parallelogram tiles. These shapes add visual interest without the full commitment of a bold pattern across an entire wall.
Natural Stone Accent Walls for Spa-Like Serenity
Natural stone brings texture and organic variation that manufactured tile can’t fully replicate. Stacked ledger stone, honed marble, travertine, and slate are popular choices for accent walls. A single wall of stone, often the one opposite the showerhead, creates a spa-like focal point while keeping costs in check compared to tiling the entire enclosure in stone.
Stone requires different prep and maintenance than porcelain or ceramic. Sealing is mandatory. Most natural stone is porous and will absorb water, leading to staining, efflorescence, or mold growth if left untreated. Apply a penetrating sealer (not a topical coating) before grouting, and reapply annually or per manufacturer recommendations. Test the sealer on a scrap piece first to ensure it doesn’t darken or alter the stone’s appearance unexpectedly.
Stacked ledger stone panels simplify installation. These are typically corner pieces with interlocking edges, mounted directly to the waterproofed substrate with thin-set mortar. They’re faster to install than individual tiles and create a three-dimensional texture that adds depth. But, the irregular surface makes cleaning more involved, grout and soap scum can settle into crevices.
For a flatter profile, large-format stone slabs (such as 12×24-inch honed marble or travertine) offer a cleaner look with fewer grout lines. Honed finishes are preferable to polished in wet areas: they’re less slippery and show water spots less readily. Marble and travertine are softer stones, so avoid acidic cleaners that can etch the surface. Slate and granite are more durable but can feel darker and heavier visually.
Budget considerations: natural stone typically costs $8–$25 per square foot for material, not including installation. A 4×6-foot accent wall is roughly 24 square feet, so material cost alone can range from $192 to $600. Add thin-set, grout, and sealer, and the project becomes a mid-range investment. Many homeowners exploring interior design options find that limiting stone to a single accent wall delivers the desired effect without the expense of a full-stone shower.
Bold Color Blocking and Contrasting Grout Techniques
Color blocking uses two or more distinct tile colors in geometric zones, often a horizontal split at waist or shoulder height, or a vertical division down the center or off to one side. This approach works especially well with solid-color field tiles in matte or semi-gloss finishes. A classic example: white subway tile on the upper walls with deep navy or charcoal on the lower third.
The transition line is the make-or-break detail. Use a metal schluter strip or bullnose trim tile to create a clean edge where the two colors meet. Without a defined border, the transition can look unfinished or accidental. The schluter strip also protects tile edges from chipping and provides a slight relief that emphasizes the division.
Contrasting grout is a lower-commitment way to add punch. White subway tile with black grout, for instance, highlights the grid and gives the shower a graphic, almost industrial look. Light gray grout softens the same tile for a more traditional feel. This technique costs almost nothing extra, grout runs about $10–$15 per bag, but has a significant visual payoff.
One caution: dark grout shows soap scum and hard water deposits more readily than light grout, so plan for regular cleaning with a pH-neutral tile cleaner and a stiff brush. Epoxy grout resists staining better than standard cement-based grout and is worth the extra cost (roughly $30–$50 per kit) and slightly trickier application in high-use showers.
For a playful twist, try ombre or gradient color blocking, tiles transitioning from light to dark across several horizontal bands. This requires sourcing tiles in multiple shades of the same hue, which can limit options depending on the manufacturer. But when executed well, it adds a custom, hand-picked quality that elevates the entire bathroom.
Conclusion
Accent tiles are one of the highest-impact, lowest-risk upgrades in a bathroom remodel. They allow homeowners to experiment with bold materials, patterns, and colors in a confined area without committing an entire room to a trend that may not age well. Whether it’s a vertical stripe, a mosaic niche, or a natural stone feature wall, the key is deliberate placement, proper waterproofing, and attention to transitions and grout work. With careful planning and execution, an accent wall transforms a functional shower into a design statement.