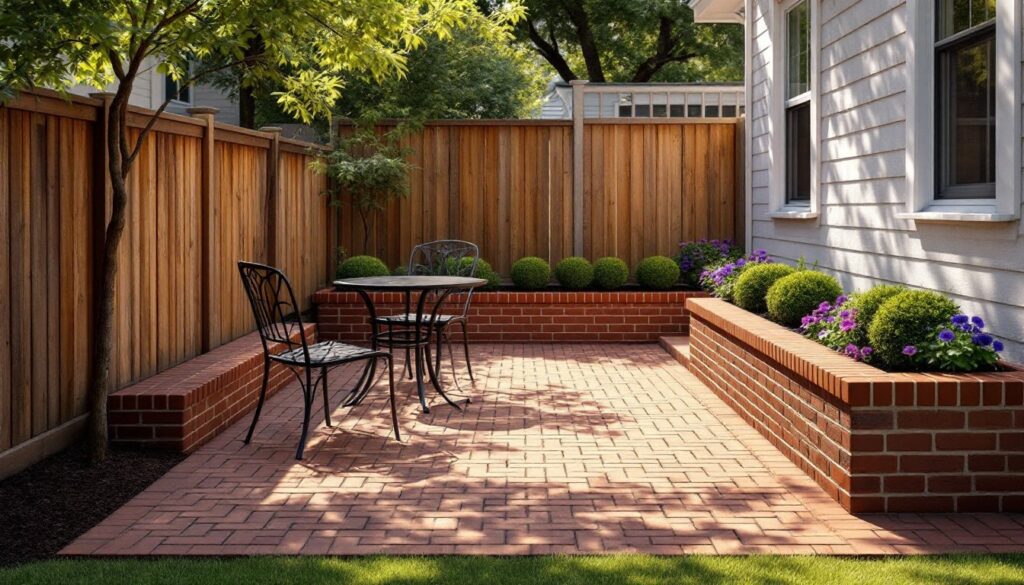
A cramped backyard doesn’t mean sacrificing outdoor living space. Brick patios deliver durability, classic charm, and surprising versatility, even when square footage is tight. Unlike poured concrete or large-format pavers, standard brick units (typically 3-5/8″ × 2-1/4″ × 8″ nominal) let homeowners create intricate patterns that visually expand small areas. Their modular size also simplifies DIY installation and future repairs. Whether working with a narrow side yard, a postage-stamp courtyard, or an awkward corner behind the garage, strategic brick layouts and design tricks can turn overlooked spaces into functional outdoor rooms.
Table of Contents
ToggleKey Takeaways
- Small brick patio ideas work best with their modular unit size, which allows precise fitting around obstacles and simplifies DIY installation without requiring specialized equipment.
- Herringbone and circular patterns visually expand tight spaces—herringbone at 45 or 90 degrees creates length while circular designs eliminate hard corners that fragment yards.
- Proper base preparation with layered gravel compaction, correct sand screed depth, and a 1/4-inch-per-foot drainage slope prevents 90% of future settling and maintenance issues.
- Brick outperforms other materials in confined spaces due to thermal mass benefits, minimal maintenance (no sealing or staining), and graceful aging that adds character over time.
- Mixing brick with secondary materials like flagstone, crushed stone, or concrete pavers stretches budgets and adds visual interest—but limit combinations to one accent material plus dominant brick.
- Sand-set brick installation is achievable for DIY homeowners with proper edge restraint, polymeric sand for joint stability, and a two-weekend timeline for a 100-square-foot patio.
Why Brick Is the Perfect Material for Small Patios
Brick outperforms other hardscaping materials in confined spaces for several practical reasons. First, its small unit size allows precise fitting around obstacles like trees, downspouts, or shed foundations without expensive custom cuts. A 4-inch wet saw handles any trimming needs, unlike the specialized equipment required for natural stone.
Second, brick’s thermal mass moderates temperature swings. Clay units absorb daytime heat and release it slowly after sunset, a real advantage in shaded courtyards that might otherwise feel chilly on spring evenings. This same property keeps surfaces cooler underfoot than concrete during summer afternoons.
Third, maintenance stays minimal. Efflorescence (white salt deposits) may appear during the first season but typically resolves after rain cycles. Moss growth in damp climates responds to stiff brushing and a mild bleach solution (1:4 ratio with water). Unlike wood decking, brick requires no annual sealing or staining.
Finally, the material ages gracefully. Slight color variation and weathering add character rather than signaling deterioration. For historical homes or neighborhoods with brick architecture, a matching patio creates visual continuity that vinyl or composite materials can’t replicate.
Classic Herringbone Pattern for Timeless Appeal
Herringbone ranks among the most popular brick patio patterns for good reason, it adds movement without overwhelming tight quarters. The 45-degree or 90-degree zigzag creates visual length, making narrow patios appear wider.
Material needs for a 100-square-foot herringbone patio:
• 450–475 bricks (standard modular size, accounting for 5% waste)
• 1 cubic yard compactable gravel base (Class II road base or equivalent)
• 0.5 cubic yard sand (concrete sand, not masonry sand)
• Polymeric sand for joints (one 50-pound bag covers ~120 square feet)
Installation requires careful edge restraint. Use metal or plastic paver edging staked every 12 inches, herringbone’s angled layout generates outward pressure that will shift borders over time without proper anchoring.
Start the pattern from a straight edge (house foundation or fence line) and work outward. Snap chalk lines every four feet to check alignment: the pattern naturally wants to drift. A dead-blow mallet and short 2×4 scrap let you tap rows into alignment without chipping edges.
For a 90-degree herringbone, bricks run parallel and perpendicular to the patio’s main axis. This version suits rectangular spaces. The 45-degree variant works better for square patios or areas where sightlines hit the patio at an angle. Both require identical brick counts but the 45-degree layout generates more perimeter cuts.
Circular and Curved Designs to Maximize Space
Curved brick layouts trick the eye into perceiving more space by eliminating hard corners that visually fragment small yards. A 8-foot-diameter circular patio consumes just 50 square feet yet provides seating for four.
Circular patterns typically radiate from a center point, with bricks arranged in concentric rings. This “soldier course” layout (bricks standing on end) creates wedge-shaped gaps that widen toward the perimeter. Fill gaps wider than 1/2 inch with cut brick pieces rather than excess sand, polymeric sand in oversized joints washes out during heavy rain.
For installation, drive a stake at the center point and attach a string equal to the patio’s radius. Sweep the string in a full circle while marking the perimeter with landscape paint. Excavate 7–8 inches deep (4 inches for gravel base, 1 inch sand, 2-1/4 inches for brick, leaving the surface slightly above grade for drainage).
Lay the first ring tightly around the perimeter stake, using the string as a constant radius guide. Work inward toward the edges. The center may require a cast concrete plug or cut brick infill to close the pattern, plan this detail before starting.
Serpentine or kidney-shaped patios soften angular yards but demand more planning. Rent a plate compactor (not a hand tamper) for curved bases: uneven compaction under curved edges causes lippage as the ground settles. Many rental yards stock 14-inch plate compactors that navigate curves without gouging.
Curved designs pair well with regional aesthetics, think Southern courtyard gardens where brick paths meander between planting beds.
Mixing Brick with Other Materials for Visual Interest
Combining brick with secondary materials stretches budgets and adds texture without cluttering small patios. A soldier-course brick border surrounding a crushed stone center (3/8-inch pea gravel or decomposed granite) delivers a cottage-garden feel at roughly half the cost of solid brick.
For this hybrid approach:
- Install the brick perimeter first, setting it in a 1-inch mortar bed for stability
- Lay landscape fabric inside the border to suppress weeds
- Fill with 2–3 inches of stone
- Edge the stone 1/2 inch below the brick surface so foot traffic stays on the pavers
Flagstone inserts break up large brick expanses. Reserve a 24-inch-square section during layout, then set an irregular flagstone piece as a visual anchor. This works especially well near seating areas or entryways. Use the same sand-set technique for both materials, mortar isn’t necessary for pedestrian traffic.
Cut stone or concrete pavers in contrasting colors create borders or grid patterns. A running-bond brick field with a limestone header course every four feet adds formality. Ensure mixed materials have similar thickness (within 1/4 inch) to avoid tripping hazards.
Avoid mixing more than three materials, a brick patio with flagstone, river rock, and pavers reads as chaotic, not eclectic. Stick to one accent material plus the dominant brick.
When estimating costs, remember that specialty stone often runs $8–$15 per square foot installed, while brick averages $5–$10. Using stone strategically as an accent keeps the project within typical home renovation budgets without sacrificing visual impact.
Vertical Elements and Built-In Features
Small patios benefit from vertical design that draws the eye upward, creating a sense of roominess. Brick itself lends to several built-in features that maximize functionality.
Integrated planters at patio edges serve double duty as seating and privacy screens. Stack bricks three to five courses high (8–14 inches) using Type S mortar (higher strength than Type N). Cap the top course with bullnose or coping bricks to shed water and provide a comfortable seating edge. Fill planters with 6 inches of gravel for drainage before adding soil.
A low brick wall (18–24 inches tall) defines the patio perimeter without requiring a footing in most jurisdictions, check local codes, as frost-heave zones may mandate footings below frost line even for short walls. Walls above 24 inches typically need engineered footings and may require permits.
Fire pits built from firebrick create a focal point in patios as small as 10×10 feet. Use a 36-inch interior diameter (48 inches exterior) for a wood-burning pit: smaller dimensions produce too much smoke for nearby seating. Line the interior with refractory mortar and firebrick rated to 2,000°F. The outer structure can be standard brick veneer. Always check local fire codes and maintain required clearances from structures (usually 10–25 feet).
Brick edging for raised beds surrounding the patio adds planting space without consuming floor area. A single soldier course (bricks on end) set in a shallow trench holds mulch and soil while echoing the patio material.
Wear work gloves and safety glasses when cutting or handling brick, sharp edges and mortar dust pose injury risks. A dust mask rated N95 or higher is essential when cutting: silica dust from masonry is a serious respiratory hazard.
Budget-Friendly DIY Installation Tips
A sand-set brick patio remains one of the most approachable DIY hardscaping projects, but success depends on proper prep work.
Base preparation consumes half the labor but prevents 90% of future problems:
- Excavate uniformly, use a flat-nose shovel and check depth at multiple points. Uneven excavation telegraphs through the finished surface.
- Compact in lifts, add gravel base in 2-inch layers, compacting each before adding the next. A single 4-inch pass won’t compact the bottom layers.
- Slope for drainage, establish a 1/4-inch-per-foot grade away from structures. Use a 4-foot level with a shim (two pennies under one end ≈ 1/4-inch slope).
- Screed the sand, pull a straight 2×4 across temporary guide rails (1-inch PVC pipe works well) to create a uniform 1-inch sand bed. Remove the pipes and fill voids before laying brick.
Cutting bricks requires either a wet saw ($40–60 daily rental) or a brick chisel and small sledge. For chisel cuts, score all four sides 1/8 inch deep, then strike sharply over a sand bed. Rental saws produce cleaner cuts and speed up jobs with numerous angles.
Polymeric sand costs more than joint sand ($25 vs. $5 per bag) but locks the surface together and resists weed growth. Sweep it into dry joints, mist lightly with water, and let it cure 24 hours before heavy use. Over-watering washes out the binding polymers, so use a gentle spray, not a hose stream.
Source brick from:
• Brick yards, best selection and pricing for full pallets (500+ bricks)
• Big-box stores, convenient but limited to 2–3 styles
• Salvage yards, reclaimed brick adds character and runs $0.50–$1.50 per unit, though availability is unpredictable
Always order 10% extra for cuts, breakage, and future repairs. Most suppliers accept returns of unopened cubes (typically 500 bricks banded together).
Timeline for a 100-square-foot sand-set patio: two full weekends for one person working solo, one weekend for excavation and base prep, another for laying and finishing. Adding a helper cuts time roughly in half.
Conclusion
Small brick patios prove that square footage and style aren’t mutually exclusive. The material’s modularity and timeless aesthetic adapt to everything from formal herringbone courtyards to casual curved nooks. With solid base prep and attention to drainage, a DIY sand-set installation delivers decades of low-maintenance use. Start with a clear layout plan, respect the importance of proper compaction, and don’t rush the details, brick is forgiving during installation but unforgiving of shortcuts afterward.